
RED HOT discoveries: Encouraging children's english conversation
Fostering independence through self managed projects
Stage One:
How this project started; The children (4-5 yrs old) were on the second floor of our new building with the dress up materials collected from home. There were many long strips of coloured material and the children were dressing each other. At one point the conversation turned to how material was made. With the teachers prompting, the children started looking more closely at the material they were using. They then started to unravel some of the smaller scraps by pulling out the individual threads at each end. The teacher then cut up some scraps and everyone explored them by pulling apart their own piece of fabric. The children were able to look closely at how the material was made by use of a magnifying glass.

Quite naturally the children could see the pattern of the weaving in the fabric. To show more obviously how this was made the teacher demonstrated the pattern of weaving by using a sheet of paper as a template (with vertical slits in it) and then weaving coloured paper through it.

Each child in the class then made their own paper sample of weaving for display and this was soon followed by slightly more elaborate looms using cardboard and string to weave short strips of fabric through.

Stage two:
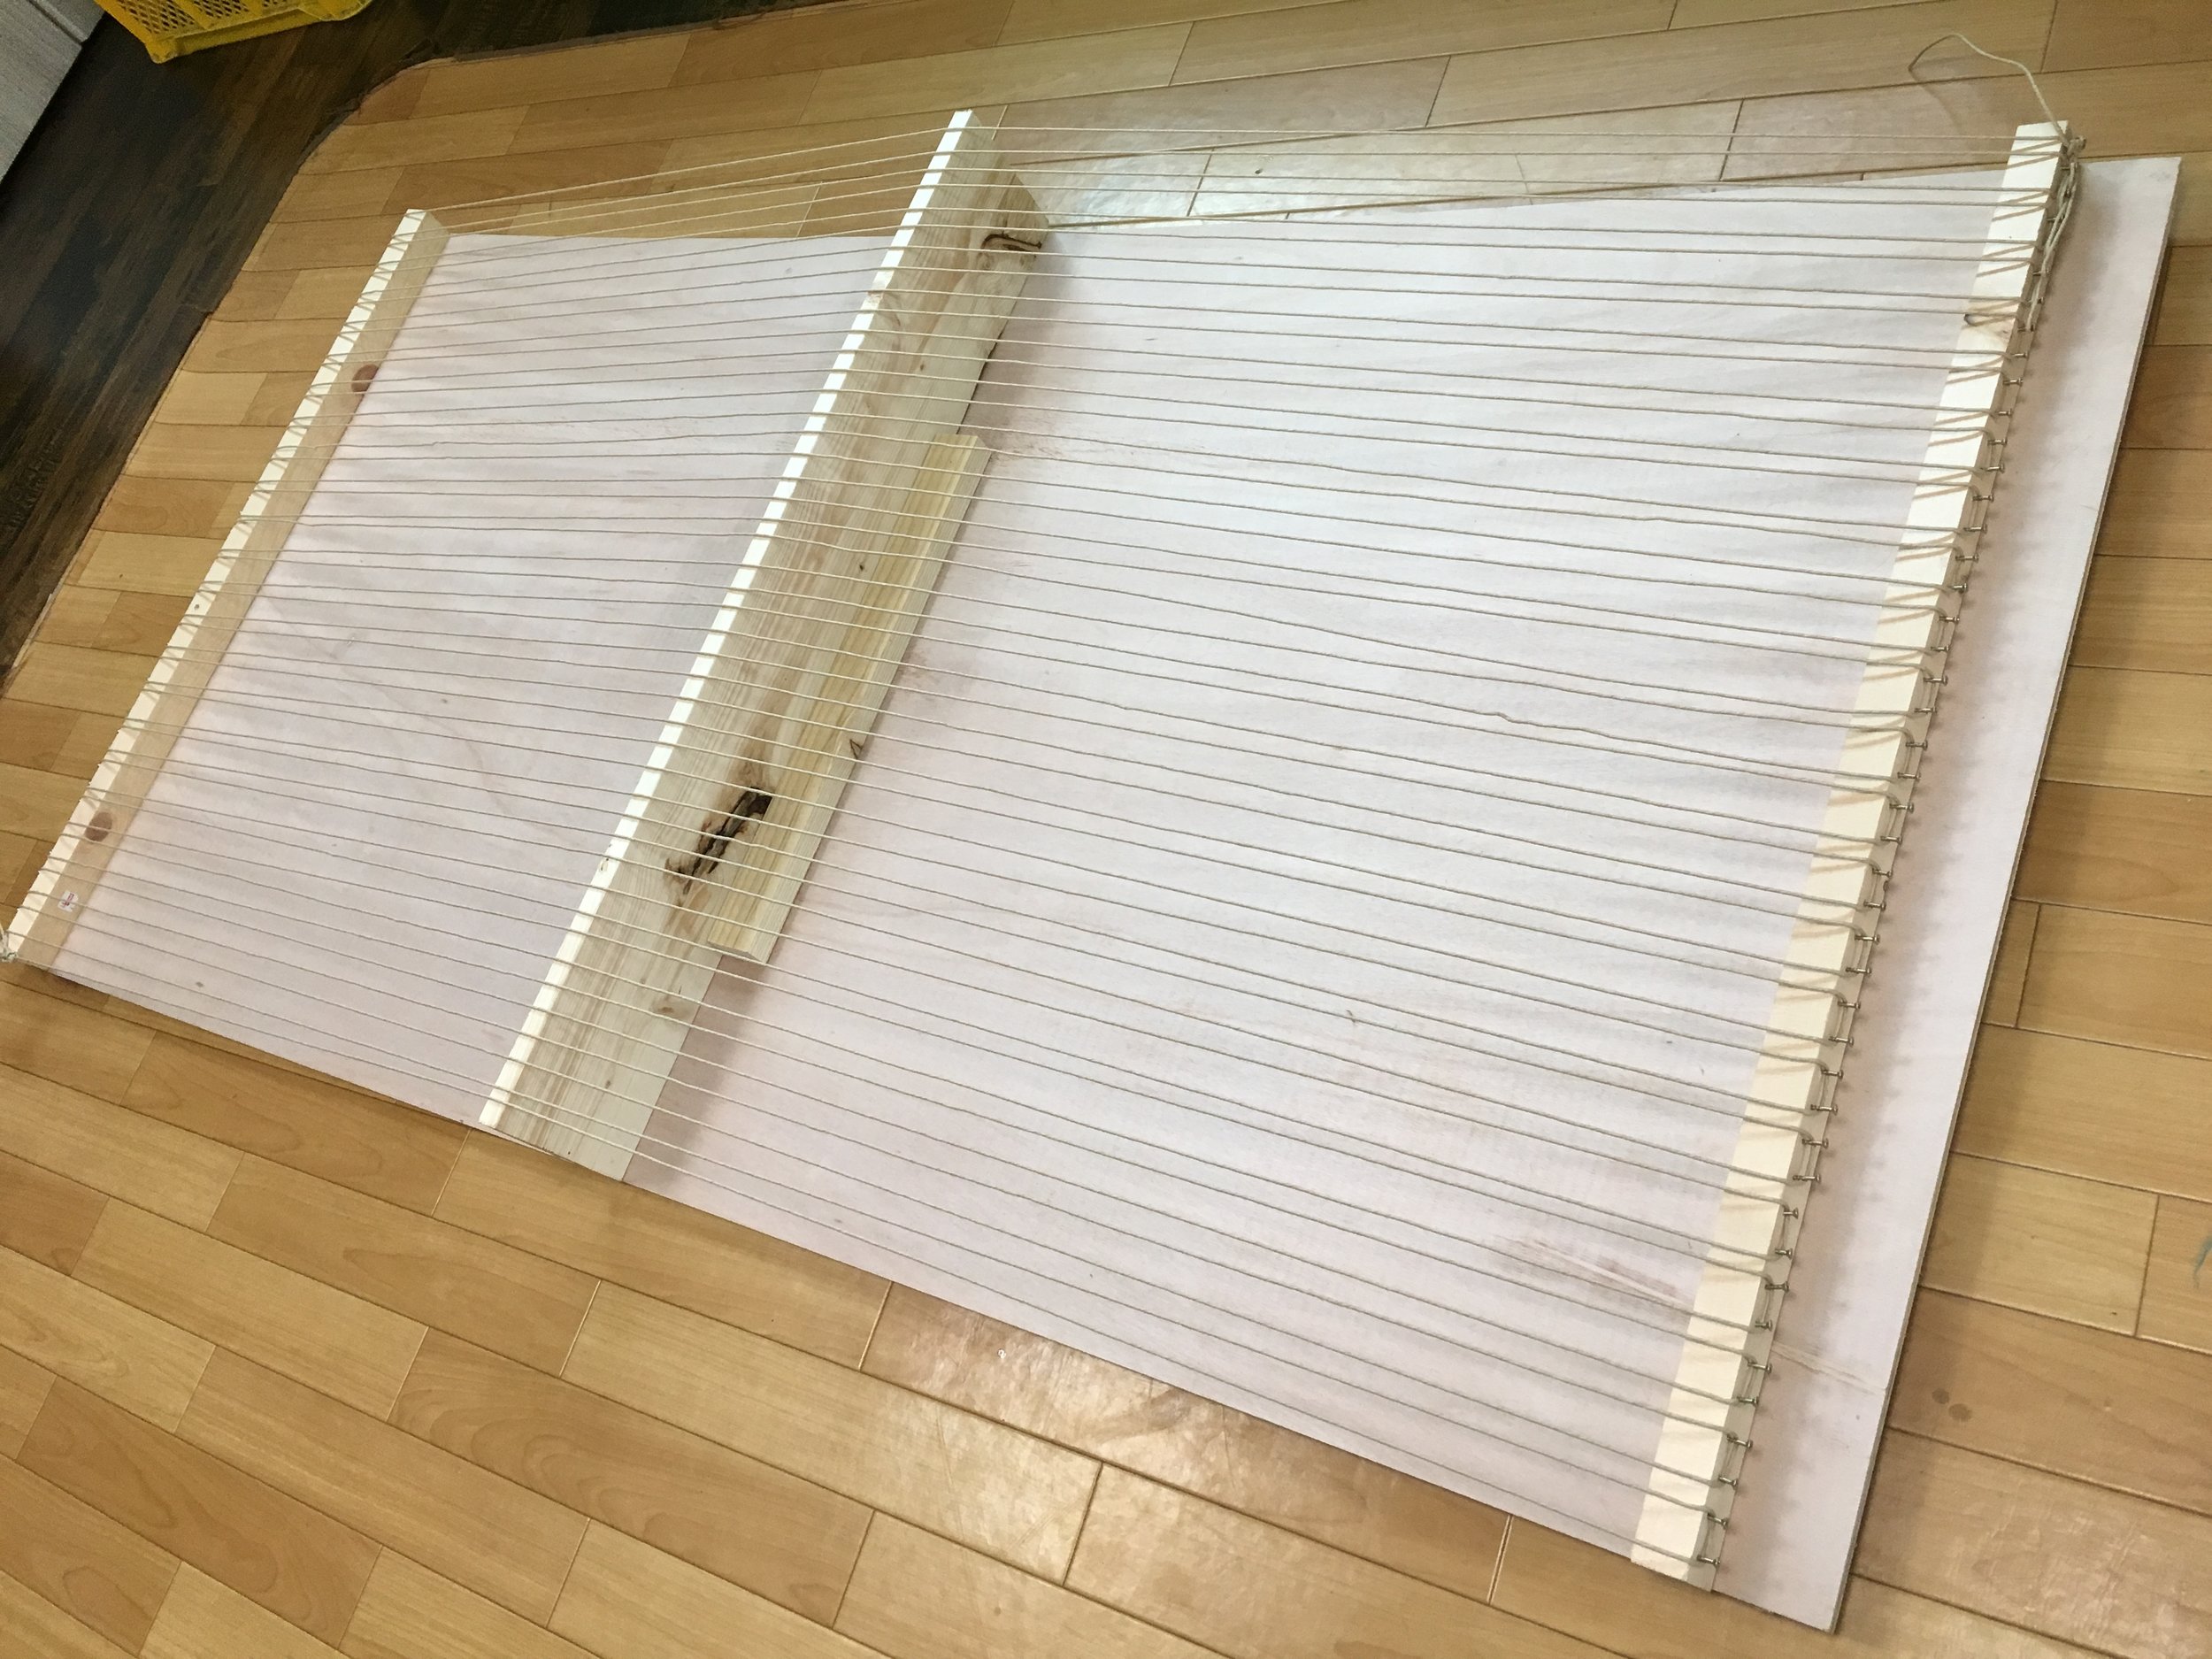
At this point the Reggio teacher and one of the directors got together and discussed ways of pushing the project further. It was then decided that the children would build their own full size weaving loom from wood for the group to use.
The director organized the materials, suggested a very simple construction plan and the class soon began its construction under the watchful eye of the teachers. The first task was to screw in 90 screws (45 each end of the loom) into two pieces of long wood. These would be used to secure the string (and raise it) at each end of the loom, which was basically a sheet of 4ply 180cm long by 90cm wide.
The teacher gets the small drill and screws from the tool box and the children line up to experience what its like to handle the drill for the first time. They hold the drill in their hands and activate it. They excitedly talk about the sound it makes and how it feels in their hands, a few of the children are also excited about the little light that comes on when they pull the trigger.
While some of the children then work to thread their cardboard looms with fabric , wool and cloth others gather to use the drill. The teacher sets out the wood and some screws while several children gather around. (Note: An indent has been made where each screw will go, they are 2cm apart) The first child puts his screw in and then hands it to another boy who drills it in too deeply (the screws have to be only half way in so that the string can easily wrap around it). He then learns to put the drill in reverse to take the screw out a bit, a learning process which seems to give him great pleasure as he has a big grin on his face!
Next one of the girls has a turn. The teacher helps her to steady the drill while she operates it in short careful bursts until the screw is level with the others. Another girl has a turn and puts the screw straight in in one go. Meanwhile the boys are going through the bucket of screws and are collecting all the small ones. They are getting very excited as they come across a variety of hooks, clips, a chain and even a padlock and key. Another boy has a turn with the drill and his screw goes in at an angle. After a time, the teacher shows him how to hold the screw straight while he activates the drill.

After some time the children manage to get all 90 screws into the two wooden (square edged) poles. The director then attaches one pole on each end of the loom with the screws facing outward.
The next day the children attempt to thread the loom. This proves very difficult as the string keeps twisting up in knots as it unravels from the spool. After a while some of the children are getting frustrated by this! However a few of the boys begin to lie inside the loom and it is suggested by someone that the boys legs could be somehow like the string. The teacher then ties off the work that they have done and gets all the children to lie down next to each other in a line on the carpet. The children then get to feel what its like to be a loom as the teacher begins to thread the long lengths of coloured fabric through their legs. Lots of squeals and laughter!

After this bit of fun the children get back to the task of stringing the loom. Everyone works as a team which helps to make things go more smoothly.

By the end of the day our giant loom is ready to go!
Stage three:
Wow! BKI has been SO busy with our Music, Drama and Dance and "FASHION" projects over the last four months. At last though we have been getting some "on and off" time to add to our weaving project. We used coloured "Bag Clips" (designed to seal plastic bags) to tie off lose ends.The results are starting to look pretty stunning!


Great colours! We collected and bought various materials over the last four months.

We wove rope, plastic, ribbon, scarves, sticks, feathers, and used clothing into the loom.

Almost complete!

Done!

The best wall hanging ever! (at least until the next one)
What can you do with your child at home ? :
By reading through what we have done with the Kids at BKI you can start your own mini weaving project at home. The paper loom sample is commonly used in many kindergartens and the cardboard loom is the next step in making something really creative.
Get a thick piece of A4 cardboard and cut “V” shaped slits in the ends. Run some string from end to end so that its as tight as you can manage and then tape the excess string to the back of the board so that it doesn’t unravel.
Go through some of your old unwanted clothes and cut them into long strips about 1cm wide. Collect wool, cloth, plastic, anything at all that you can add to the weave. Then show your child how to weave the materials into your loom. Once they get going it will keep them occupied for hours, weeks or even months!
The results make great wall hangings and is something your child can feel proud to have made themselves.
So much fun!